Showing posts with label recipes. Show all posts

Monday, 30 January 2012

Modification Monday... Fail. But Oatmeal Cookies Perfected!

For the first time ever, I haven't heard back from any of the people I've contacted for a Mod Monday. I'm sorry, guys!! I'm sure I'll hear back from the knitters I've contacted soon. In the meantime, may I beg forgiveness with cookie?

G calls these the best oatmeal cookies in the world... and I'm going to go ahead and agree with him.
DSC_1705-1

First, let's make sure our expectations are in line. First up- these are plain, old fashioned, no-frills oatmeal cookies. There are no chocolate chips. It's not a fancy cookie. But hot damn, they are perfection. if you like a classic oatmeal cookie, then this is the cookie for you.

Ingredients:
  • 1 1/2 cups rolled oats*
  • 1 3/4 cups all purpose flour
  • 1 tsp baking powder
  • 1 tsp baking soda
  • 1 cup butter, room temperature
  • 1 1/4 granulated sugar
  • 1/4 cup molasses
  • 1 egg, beaten
  • 1 tsp vanilla
  • pinch off salt
  • 1 cup golden raisins 
* The oats need to be rolled oats- not the weird, quaker oats flaked stuff that looks like it's been swept up off the floor of a processing plant. This really affects the texture.
  
Directions:
  1. Preheat oven to 375F (190C) 
  2. In a bowl, mix together rolled oats, flour, baking powder, baking soda and salt. Set aside. 
  3. In a large bowl, cream together butter and sugar with an electric mixer until light and fluffy.
  4. Beat in egg, vanilla and molasses. 
  5. Stir dry ingredients into butter mixture until combined, add raisins. 
  6. Shape into 2 inch balls and arrange on an ungreased baking sheet. 
  7. Bake for 10-12 minutes, until lightly golden brown.
  8. Try not to eat them all at once. 
That's it!

DSC_1708-2

Friday, 25 February 2011

What I'm Into Now: New Music


Feeling like you need a catchy little tune? I love this song, and the video is too cute:
Asa- "Be My Man" And this is really making the rounds lately, but I can't resist- It's a great little love anthem:
Edward Sharpe and The Magnetic Zeros- "Home" I Also I have a serious girl crush on Oh Land. I love everything she does!! Listen to this, you'll love it:
Oh Land : "Sun of a Gun"   The new Radiohead album dropped on Friday, and this video of Thom Yorke's dance moves is pretty awesome:
Radiohead- "Lotus FLower"


I'm addicted to this conconction I created. I know it sounds gross, but honestly- everyone I've had try this loves it. The orange juice does a good job of covering the veggie taste, but it does turn green. The spinach blends in more thoroughly than the kale, so if you aren't into kale (I'm truly, madly in love with kale, I put it in everything) then just use the spinach. As an added bonus, consuming vitmain c and iron together helps your body absorb both better, so this is really a powerful juice!

1.5 cups of orange juice
1 cup kale leaves (destemmed, with veins removed)
1 cup spinach leaves

Directions: In a blender (or magic bullet, like I have)blend the orange juice and kale together first, for about 60 seconds. Then add spinach, blend for another 60 seconds. Drink and enjoy the fact that you are getting a tonne of healthy stuff in a tasty drink!

Before anyone asks, no, you don't strain it. Get the fibre! The texture is similar to that of a smoothie- sort of thick. I recommend drinking it within 20 minutes of making it, otherwise the veggie bits start to sink to the bottom.   And whatever you do, don't use a food processor-  I tried this in a food processor once, it totally didn't work. Too chunky, and didn't get that smoothie texture.

I know I usually post sweet treats on here, so ta-da! Drink your veggies, my lovelies.

Sunday, 6 February 2011

The Seven Days of Hot Chocolate: Banana Hot Chocolate

Bananas AND chocolate? Monkeys everywhere just lost their minds. 
DSC_0812-4


Ingredients:

3 cups of milk (26 fl. ounces)
60 g dark chocolate
1 tsp. vanilla extract
1/3 cup sugar
1 banana, ripe


Directions: Blend the banana and half of the milk in a blender, adding the vanilla to the blended mixture. Seperately, melt the dark chocolate into a saucepan of milk on medium-low heat. Stir in sugar, vanilla extract, and then fold in thed blended banana mixture. Simmer on low heat for a few minutes, stirring constantly. Then pour into cups and enjoy!


Substitutions:

  • use vanilla flavoured soy milk instead of regular milk; omit additional vanilla and reduce added sugar
  • use 1/3 cup cocoa powder instead of dark chocolate. Not as smooth, but still good!
  • use 1/4 cup of agave nectar if you are avoiding refined sugar

Saturday, 5 February 2011

The Seven Days of Hot Chocolate: Orange Hot Chocolate

This one is my favourite, but I'm obsessed with chocolate and orange as a flavour combo. If you feel the same way I do, then you'll want to drink this every day.

DSC_0782
Ingredients:

3 cups of milk (26 fl. ounces)
60 g dark chocolate
1 tsp. vanilla extract
1/2 cup sugar
1 tbsp grated orange zest


Directions: melt the dark chocolate into a saucepan of milk on medium-low heat. Stir in sugar, vanilla extract, and then add the orange zest and let simmer on low heat for a few minutes, stirring constantly. Then pour into cups and enjoy!

Notes: I recommend using organic oranges, if you can find them. Otherwise really scrub it down well before zesting to avoid a lot of 'food grade' wax in your hot chocolate.


Substitutions:
  • use vanilla flavoured soy milk instead of regular milk; omit additional vanilla and reduce added sugar
  • use 1/3 cup cocoa powder instead of dark chocolate. Not as smooth, but still good!
  • use 1/3 cup of agave nectar if you are avoiding refined sugar

Thursday, 3 February 2011

The Seven Days of Hot Chocolate: Raspberry Hot Chocolate

DSC_0785-4
Ingredients:

2 cups of milk (26 fl. ounces)
60 g dark chocolate
1 tsp. vanilla extract
1/2 cup sugar
1 cup raspberry juice (recipe to follow, or see substitutions for using jam)


Raspberry Juice:
if using frozen raspberries (and I recommend, they give up the juice more easily), set raspberries aside in a bowl at room temperature. After a few hours, mash with a fork or blender and strain mash through a sieve. The liquid below the sieve is what we'll use for the recipe. I used my leftover raspberry chunks for a smoothie, if you want to do the same.

If using fresh raspberries, wash well and mash with a fork or blender. strain mash through a sieve. The liquid below the sieve is what we'll use for the recipe.


Directions: Melt the dark chocolate into a saucepan of milk on medium-low heat. Stir in sugar and vanilla extract. Stir in the raspberry juice; then pour into cups and enjoy!


Substitutions:
  • try using seedless raspberry jam instead of fresh/frozen raspberries, omit sugar
  • use vanilla flavoured soy milk instead of regular milk; omit additional vanilla
  • use 1/3 cup cocoa powder instead of dark chocolate. Not as smooth, but still good!
  • use 1/3 cup of agave nectar if you are avoiding refined sugar

Wednesday, 2 February 2011

The Seven Days of Hot Chocolate: Lemon Hot Chocolate

DSC_0781 My charming British husband adores Thornton's chocolates (which you can only get in the UK), particularly  the Sicilian Lemon ones. I have to agree, they are pretty awesome- yet you seldom see lemon and chocolate together in anything but a box of chocolates. Well, no more!

Ingredients:

3 cups of milk (26 fl. ounces)
60 g dark chocolate
1 tsp. vanilla extract
1/2 cup sugar
1 tbsp grated lemon zest


Directions: melt the dark chocolate into a saucepan of milk on medium-low heat. Stir in sugar and vanilla extract. Stir in the lemon zest and let simmer very gently for a few minutes, stirring constantly. Then pour into cups and enjoy!


Notes:
I recommend organic lemons if you are grating zest for anything. Otherwise you're mostly adding a lot of 'food grade' wax to your zest as well. But hey, if organic lemons aren't handy where you are, you certainly will be just fine with normal lemons. Also, whoever is having the  mug that was poured last may find a fair bit of zest in the bottom of their mug.


Substitutions:
  • use vanilla flavoured soy milk instead of regular milk; omit additional vanilla, reduce the added sugar to about 1/4 cup
  • use 1/3 cup cocoa powder instead of dark chocolate. Not as smooth, but still good!
  • use 1/3 cup of agave nectar if you are avoiding refined sugar

Tuesday, 1 February 2011

The Seven Days of Hot Chocolate- Peanut Butter Hot Chocolate

If you love peanut butter and chocolate, then this is the one for you.

DSC_0780
Ingredients:

3 cups of milk (26 fl. ounces)
60 g dark chocolate
1 tsp. vanilla extract
1/2 cup sugar
1/3 cup peanut butter

Directions: melt the dark chocolate into a saucepan of milk on medium-low heat. Stir in sugar and vanilla extract. Stir in the peanut butter really well; then pour into cups and enjoy!

Substitutions:
  • use vanilla flavoured soy milk instead of regular milk; omit additional vanilla
  • use 1/3 cup cocoa powder instead of dark chocolate. Not as smooth, but still good!
  • use 1/3 cup of agave nectar if you are avoiding refined sugar

Notes: it's hard to take pictures of hot chocolate in the evening, which is when I made most of these recipes. I totally need a light box which G built out of a recycled cardboard box and I got whipped cream and hot chocolate all over it. A machine washable lightbox.

EDIT: Some have asked about the mugs. I got them from an etsy seller that doesn't seem to have a shop any more! Her blog can be found here, perhaps you can convo her if you are really interested. 

Friday, 28 January 2011

The Seven Days of Hot Chocolate- Coming Very Soon

I've been percolating an idea in the back of my brain since December- creating 7 different, new hot chocolate recipes to help celebrate this chilly season.

But I swear, something must've been in the water (or the milk in this case!), because since I started working on it, I've seen recipes coming out in the new issue of Martha Stewart, saw a Nutella version on Pinterest.... another on Tastologie.... and there are probably more hiding out there in the great wide interweb! But hey, better late to the party than a no-show. Starting February 1st, I'll be posting a new hot chocolate recipe that I've concocted every day, for seven days. This means that there will be a slight break in Modification Monday (still posting for January 31st, but we'll be skipping February 7th).

The recipes are meant to be shared, so you'll find them all making enough for 2 large mugfuls of chocolatey goodness, or three smaller ones. I hope you'll find at least a couple recipes you will want to make!!


Wednesday, 1 September 2010

G and I brought my 14 year old brother (who is making his first appearance on this blog- I bet none of you knew I even had a brother!) beryr picking recently. He's getting so tall.
DSC_0534
 (it rained, hence the flat, disheveled hair. Mine, not his.) 

We made pie, but as you can tell from the above baskets, one pie was not going to take all those berries. So I spent a full Sunday morning turning this:strawberries into this: homemade strawbery jam
(there were many jars, actually. But I figured a photo of one would be plenty)

In other culinary adventures, I also tried out the very intriguing Root Beer Bundt Cake recipe from Baked. I even tracked down root beer schnapps for the added root beer taste, but i have to say... I'm not sure what I think. I love root beer, but in cake form, it just tasted kind of odd to me. And the chocolate was pretty strong, so if no one told you it was a root beer cake, you'd just be trying to figure out what that odd taste was. Having said that, this recipe produces a damn fine looking cake, no?
root beer bundt cake 2
I would make this again, but I think I'd substitute the root beer schnapps for cointreau. Orange and chocolate, there's a flavour combo my taste buds can wrap themselves around.
root beer bundt cake close up
(nom nom nom)

Wednesday, 28 July 2010

What I'm into Now: Summer, Glorious Summer

It's no secret that I like baking, cooking, and all sorts of other kitchen-y good things. However, it's been a gloriously hot summer. HOT. which means cooking doesn't sound nearly so attractive, since my apartment only has one window unit air conditioner, and it is at the opposite end of the apartment from the kitchen. But I've definitely tried my hand at some new things this summer. For example:
 
Making ketchup from scratch was probably one of the easiest and most satisfying from-scratch things I've done all year. It's so easy, and much healthier than normal ketchup (since there's high fructose corn syrup in most commercially prepared ketchups). And it tastes amazing!
(why yes, I did make ketchup from scratch and then use it with terrible, frozen food section McCains's fries. I know that makes no sense. I put it on delicious home-made burgers a day later, I swear. )

Ribs. Specifically, this recipe, which makes the most delicious ribs I have ever had. You MUST try this recipe, it's to die for. G and I are very particular about buying only local, organic meat from stores/butchers that can vouch for the humane treatment of the animals; so we don't eat meat often, but when we do- we pull out all the stops. 

 This has also been my summer of sangria. I pretty much have a pitcher of it on the go in my fridge all the time. I do both red and white sangria, and I find it so relaxing to sit outside on our patio drinking sangria and relaxing, I've yet to remember to take a picture. But trust me- sangria, taken like a daily post-work vitamin, is good for the soul.

Also, I tried my hand at making my own insect repellent spray using these guidelines, and I had a lot of success. I found that the natural one I mixed up needed to be reapplied frequently, but I figure that's a small price to pay to avoid DEET and other harsh chemicals.Has anyone else tried making their own bug spray? I'd be interested so see what other essential oils people have tried.

We've also made friends with the friendly squirrel that lives under our patio:


 (in the top left photo, he actually has a bit of ice cream on his nose! 
That would be G's idea, of course) 
 
Isn't he a cutie? Although I think we've become a bit too friendly with the squirrel- we've had to stop propping open the patio door for the cats, because twice the squirrel has decided to come into the kitchen, and once he actually chewed the lid off of some cocoa powder. Squirrels are much cuter when they are not terrorizing your kitchen!

Friday, 16 April 2010

20 kg (44 pounds) of Flour

Our local grocery store had an amazing sale on all-purpose flour recently, and G graciously went to the store to get flour for me (since I complain if I have to carry anything heavy for more than 3 minutes).

But we had a slight miscommunication on the quantity of flour to get. And my wonderful husband came home with 20 kilograms (44 pounds) of flour.
My darlings, this is a lot of flour for a household of two people.Those two bags are stacked in front of the washing machine. Note how you can no longer see the washing machine.

Which makes me wonder... did he do it on purpose?

You know, I think he did.
clockwise from top left: wheat bran bread, peanut butter cookies, earl grey shortbread cookies, vegan chocolate layer cake, the vegan chocolate layer cake before it was sliced, cinnamon swirl wheat bran bread.


I've been on a huge bread baking kick since this flour showed up. I have baked bread before, but only recently found the perfect loaf that meets all my needs- the wheat bran recipe from Artisan Bread in Five Minutes a Day. They have a website with some recipes, (although sadly not this one) and honestly I can't recommend the book enough. It lays out their system for making fresh bread easily with very little hands-on work. It's brilliant. I haven't had any failures, and the bread is AMAZING- full of flavour, great texture. I'm never going back to store bought bread again!!

I also recently experimented with a Creme de Cassis sugar cookie. I started off with the Martha Stewart recipe, but made the cookies thicker, for better texture. The recipe is the same, but my dough technique is below, if anyone wants to try it out:

I loved these cookies, and so did everyone else who ate them. You can't taste the crème de cassis really, but it gives these cookies a little something, a je ne sai quoi.

After all of the above (and there have been several more plain bread loaves that never got photographed), I'm still not even 2/3 through one of the bags.... which makes G so, so happy. He knows there's plenty more fresh baked goodness to come.

Friday, 26 February 2010

Link Love .... and a Madeleine Quest!

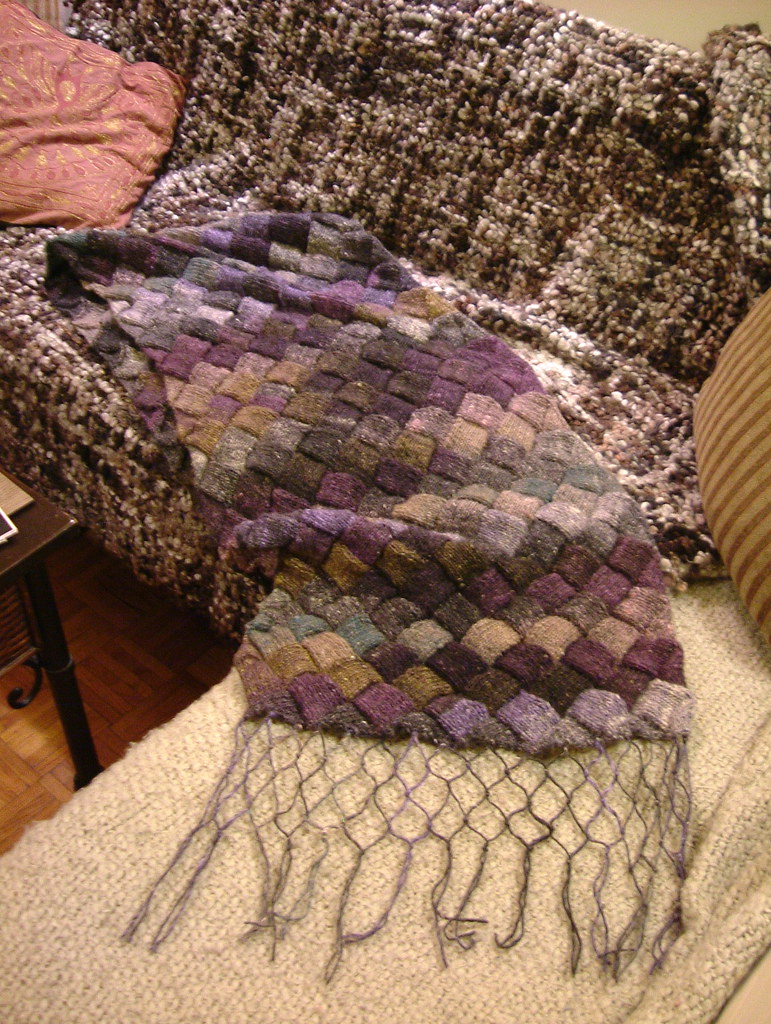
Since the demise of Domino and Blueprint (which were pretty awesome shelter magazines for the stylish/ modern/eco-friendly/DIY set), I've noticed that there are some fabulous online shelter magazines cropping up- notably Lonny and Nesting Newbies. People have mixed opinions about online magazines: I personally love them because then I can read magazines at work the embedded links make it a snap to click and discover new shops, designers, and information out there in the vast realm of the internet. Not to mention it means that it is way cheaper to produce issues, so the likelihood of folding reduces significantly.


So, if you are looking for a little home decor/ lifestyle magazine fix, click away! The Nesting Newbie link takes you to their website, and the magazine is on the right hand side f the screen. The Lonny link takes you straight to the magazine.  

Now, onto baking!!

I'm on a quest for the perfect madeleine recipe, something that makes each lovely scalloped beauty a delight on the tongue. I had never even thought of them before Christmas, when I received two silicone baking sheets from my in-laws specifically for these shell shaped wonders.

Now, I can take hint. My in laws want madeleines. And who am I to argue with that?


My first attempt with this recipe yielded mediocre results. Okay, I over baked them by about a minute, but that wasn't really the problem- they lacked flavour. Truly a disappointment, because I loved the actual performance of the recipe- The kitchen was lush with the fragrance of melted butter infused with lavender earl grey tea, and muddling the freshly grated lemon zest with the sugar until it smelled like absolute heaven. So why the heck couldn't' you taste the lemon or the earl grey once it was baked? It was as though no earl grey, lavender, or lemon were ever in the same room as these things. Mysteries of the universe, I tell you.

Then I tried this recipe, and I got tasty results, but ugly madeleines- they weren't baked enough, the crumb was really big and muffin-like, and they just needed a bit more finesse. So, I  adjusted the recipe until it was just right.

(my glaze was too runny, and I didn't have any more icing sugar at the cottage to thicken it up. Learn from my mistake!)

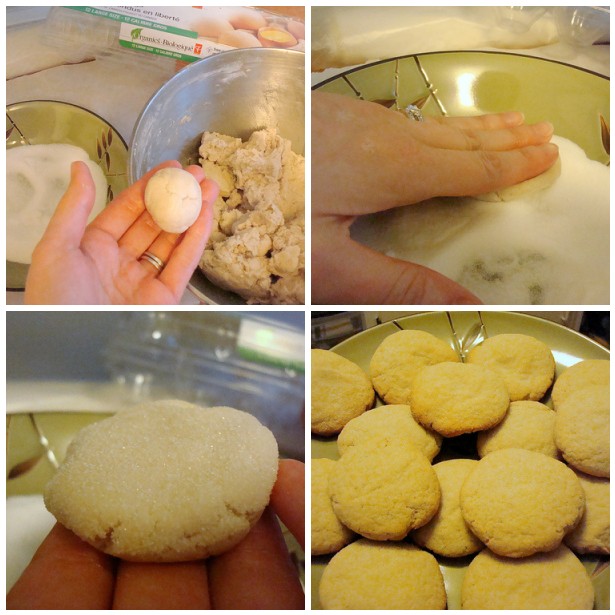
Julie's Orange and Cardamom Madeleines
(makes 15-18 madeleines)
Ingredients:
1/4 cup (1/2 stick) unsalted butter
1 tablespoon honey
1 teaspoon vanilla extract
3/4 cup all-purpose flour
1 teaspoon baking powder
1 teaspoon ground cardamom
1/4 teaspoon salt
1/4 cup granulated sugar
2 large eggs
3/4 cup icing sugar
2 teaspoons finely grated orange zest, plus 2 tablespoons strained orange juice

Directions:
1. Lightly grease and flour your madeleine pan(s). Set aside.
2. Melt the butter in a small saucepan on the stove, adding in the honey, vanilla, and  orange zest. Once butter is melted, remove from heat and let cool (about 15 mins).
3. In a bowl, whisk together the flour, baking powder, cardamom, and salt. Set aside.
4. In your mixing bowl, beat the sugar and eggs on medium high with an electric mixer for 2 minutes.
5. Fold in dry ingredients into the sugar and egg mixture. Then pour the melted butter mixture in, and stir until well combined. Spoon batter into the madeleine tray(s).
6. refrigerate tray(s) for one hour, or overnight. If you refrigerate overnight, press plastic wrap against the trays, covering the batter tightly.
7. When ready to bake, preheat your oven to 350C. Remove plastic wrap if you used it, and pop them directly into the oven for 8-10 minutes.
8. once they are removed from the oven, Allow them to cool briefly in the trays, and then pop them out on to a wire rack to completely cool.
9. mix together the icing sugar and orange juice, to make a thick glaze. Add the orange juice a little at a time, to keep the glaze thick. I also added a bit of vanilla, which worked well. Once madeleines are cooled completely, tip the tip of each madeleine into the glaze, and put onto a plate.
10. Now try to eat only one. Really- I dare you to stop at one.


In my research, it's evident that people are passionate about madeleines. Apparently, with the die-hards you can't even call them cookies. To be fair, they are a lot more cake-like than cookie like. And the batter that is produced is definitely on the wet side... it reminded me of pancake batter. Which led to me wondering if you could bake pancake batter in the madeleine moulds, and then dip them into maple syrup.

Turns out, you can. G and I had an amazing breakfast one morning feasting on scalloped shaped pancakes dipped in small bowls of pure maple syrup. It was so tasty, I didn't think to grab a photo. but trust me on this- madeleine pancake are seriously awesome. Use whatever pancake batter you like best, then bake them in the madeleine pans at 350C for about 7 minutes (I'd check them at 5, in case your oven runs really hot). Enjoy!!

Thursday, 24 September 2009

The Best Damn Smoothie Recipe

 I've been reading A Homemade Life: Stories and Recipes from my Kitchen Table. I highly recommend! This beautiful and charming book is a cross between a cookbook of delicious recipes and a moving recount of a woman's life impacted by her family's and her own love of food and food preparation. Everyone should read this and realize that it's important to cook with your kids, and it's important to eat meals as a family. I'm not surprised that the author's blog is so popular- she write in a way that is honest, simple, and compelling, just like her recipes.


I love to cook and bake, but my apartment's oven is a shameful disappointment- it heats really unevenly, and I pretty much have to rotate everything that goes in there several times, as well as play with the bake vs. broil settings to prevent the bottom from getting burned while the top is undercooked.  I know it sounds silly, but when I cook something and it turns out badly, I take it personally. I can handle bad knits, I can handle a bad day at work, but a bad turn in the kitchen? Makes me want to sob like a little child.

A recent baking success has been Snickerdoodles. Have you ever eaten a Snickerdoodle? I made a batch on the weekend and they were AMAZING. Like the perfect cross between a doughnut and a cookie. Simple, sugary, lovely. I wish I had snapped some pictures before they all got eaten! Recipe (and an accurate photo) are here. But here is a recent winning recipe from my kitchen (possibly because it doesn't involve the oven). My husband is in LOVE with this. Heck, I'm in love with this! It is, without question, the beast smoothie I've ever had, anywhere.

The  Best Damn Chocolate/PB/Banana Smoothie You'll Ever Have

Ingredients:

  • 1 banana


  • 3 cups of skim milk


  • 7-10 ice cubes (if you want it really thick, add more ice cubes)


  • 1/3 cup of smooth peanut butter


  • 1/4 cup chocolate syrup


  • Directions: through it all into a blender and let 'er rip for about 4 minutes, or until all your ice has been fully incorporated into the smoothie. The long your blend, the frothier it gets.

    Servings: 4. Or two huge portions that pretty much make you full for hours, which is what happens in our home.

    G is a total chocoholic, so you might be happier with a bit less syrup, but in my house that would be sacrilege. If you try it, let me know what you think.

    Sunday, 1 June 2008

    Strawberry Bread and Sock Vote Tally!

    The votes are in, and Jules wins! I'll be casting on for Jules in the next couple of days. Thanks everyone for helping me decide!

    I've been wanting to bake this recipe ever since I saw it a week ago. Today was that day... I made Strawberry Bread.
    Look at how pink the batter gets: And here's a shot of it just before it's baked: and then here's a shot of it after it comes out of the oven:The strawberry bread is basically like a banana bread, in terms of general baking time and recipe structure. It turned out perfectly, but I kept thinking that it would be even better as muffins instead of a loaf. And it would really shorten the baking time (one solid hour in the oven). That, and muffins mean maximum slivered almond consumption. Mmmmm. I will make this again, but in muffin form, and then tell myself it's a very nutritious snack while I devour several of them.
    Let's get a close-up, shall we? Oh yeah, that's what I'm talking about.

    And since it's Self Portrait Sunday, Here is a shot I took (thank you timer function!) while I was licking the bowl and talking to my mom on the phone.... I haven't quite got the apprehension out of my face about having my photo taken, and that's something I really need to work on. But hey, it's still an accurate shot. Messy kitchen and all!

    Monday, 10 December 2007

    Double FOs, and Raspberry Pear Pie (Warning: Tons O' Pics)

    A double whammy of FOs today. First up, Lady Eleanor, in all her unblocked glory.Pattern: Lady Eleanor Entrelac Stole by Kathleen Power Johnson (Scarf Style) Yarn: Noro Silk Garden, colour way #243, ten skeins Needles: 5 mm Modifications: The standard one: dropped the needles size down to 5 mm (pattern calls for 6.5 mm) And then I just knit until I ran out of yarn, basically. Notes: it's still pretty big for my small-ish frame. I think it would be a great size for someone a bit bigger than me, or I could have not cast on for as many blocks, but I still love it to no end. I may have spent most of the evening cuddled up in it. My apologies for the blurry photos, for some reason, my camera is not fond of taking photos in the mirror. I probably should've asked for a new camera for Christmas. Oh well. Next year. Next up: Quoddy Scarf. This is going to be a Christmas gift for my Dad. Pattern: One Row Handspun Scarf by Stephanie Pearl-McPhee Yarn: Briggs & Little Regal, in Quoddy Blue. 2 skeins. Needles: 6 mm Modifications: What's to modify? it's four stitches, over and over and over again. If you need a mod, you probably are knitting a different scarf. Notes: This is now my go-to scarf stitch pattern. It's simple, completely reversable, and utter perfection. Love it. I do not, however, love this yarn. It's super itchy, and I usually have a really high tolerance for itchy yarns. I'm going to block this in a lovely conditioner-filled bath, to soften it up. And since I infinitely prefer modelled shots of FOs, here are a couple of me wearing my Dad's future scarf: And if you are looking for a delicious new pie that you probably haven't tried before, look no further. I give you... Raspberry Pear Pie. I don't know where I got the idea, but I was hell bent on making a raspberry and pear pie for Sunday dinner (some friends and I have a regular Sunday home cooked dinner gathering. It's a feast, and feels so homey and comforting, especially in winter. I usually bring pie or wine.). I kind of made up the recipe as I went, so here are the notes for it, so you can make your own raspberry pear pie. It would likely also make an excellent crumble, for those who think making pie crust is dreadful business. Ingredients: - Pie pastry of your choice (I use the one on the back of the Tenderflake box, and it's great) - 2 pints of raspberries (500 g) - about 9-12 pears (I used Bosc pears) - quarter cup of orange juice - 2 tablespoons of brown sugar - 1 tablespoon of cinnamon - half cup of white sugar (you'll need 2 quarter cups in each step, plus more for dusting) - a pinch of salt - 3 table spoons of flour Preheat your oven to 350(f) degrees. Peel and core the pears, and cut into chunks. In a large saucepan, simmer the orange juice, pear chunks, pinch of salt,and a quarter cup of the white sugar. Stir reguarly, and let them simmer until nice and tender, about 20 minutes, depending on the ripeness of your pears. This is necessary because pears do not behave like apples in pie- they won't get soft if you skip this step. When the pear chunks are tender, transfer to a strainer and let cool. The strainer is to let any excess juice drain off (and to avoid watery pie syndrome). While the pears are cooling, wash the raspberries, and pat them dry (again, to avoid watery pie syndrome). Now sort out your pastry- roll it out, throw a pre-fab pie shell together, whatever you please. Now throw the pears in a bowl, although the raspberries, cinnamon, flour, brown sugar, and the remaining quarter cup of white sugar. Toss together lightly. Dump into pie crust. Now for the top: The star top is something I did before I perfected my pastry making skills. I was making an apple pie for a Christmas party, and my dough was refusing to stay together and be lifted on top of the apple pie. So, I grabbed a cookie cutter, cut out a bunch of stars, threw them on top, and baked it like that. That was 5 years ago, and I'm still getting requests for 'Star Pie'. Lightly dust the top with some white sugar and bake for 1 hour, although you may wish to put foil around the edges of your pie crust to prevent burning, if your oven is prone to that kind of acting out. Sorry there are no photos of the interior- in our fervour to eat the pie, we didn't pause for photographs. And the whole thing is gone now. For a pie that no one had ever tried before, it certianly was popular.