Showing posts with label Upcycled Cardi Challenge. Show all posts

Wednesday, 25 April 2012

FO: Upcycled Cardi Challenge

DSC_1916
 
(to view all the posts in this series, click on the 'upcycled cardi challenge' tag)

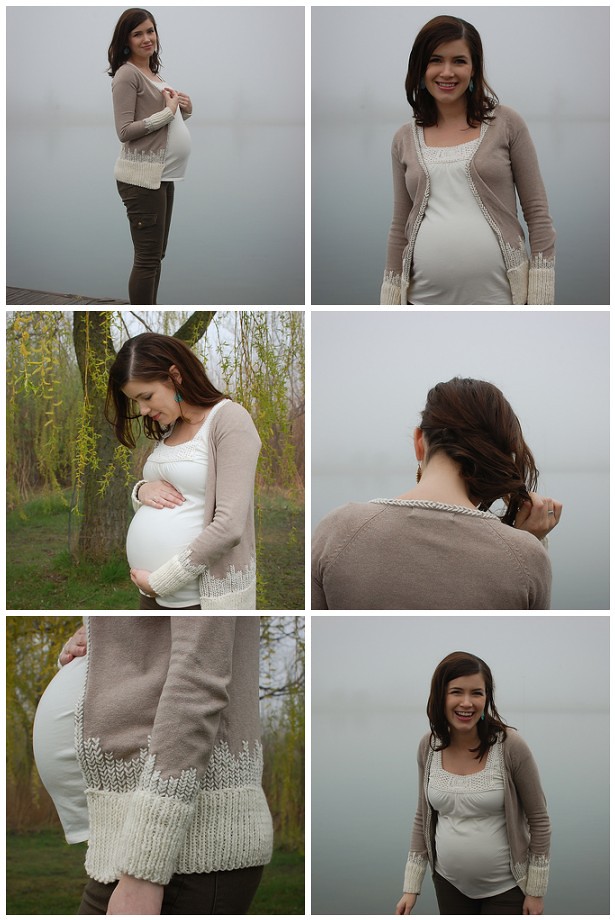
I'm so pleased with how this turned out! The cardigan is exactly how I envisioned, and I'm excited to wear it post-baby bump, too. Currently it's a wee bit tight on my arms, but that's due to baby weight gain (it better be, anyway), so I hope it comes off after the little one moves out of me and into the world.
DSC_2002

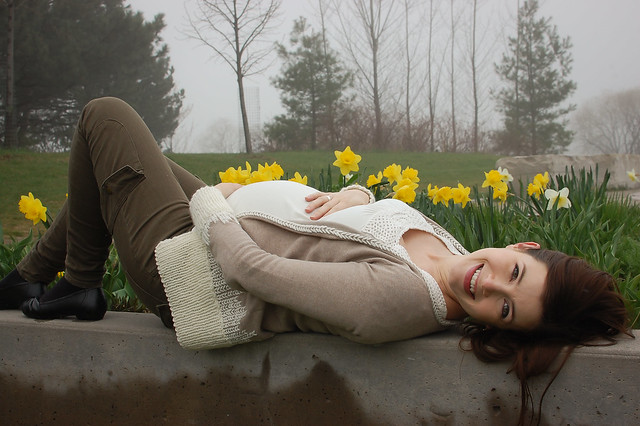
These photos were taken the day before little Lila came into the world! 

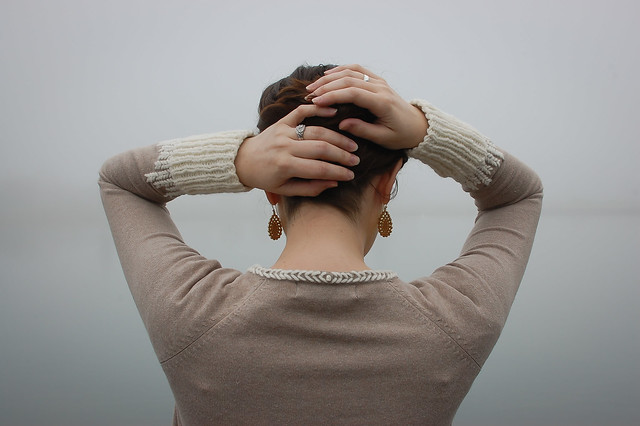
The back detail- as the tiny V shapes met at the back of the neck, I thought it would be nice to have a little french knot to finish off the details.

DSC_1917

Answers to questions on the previous post:
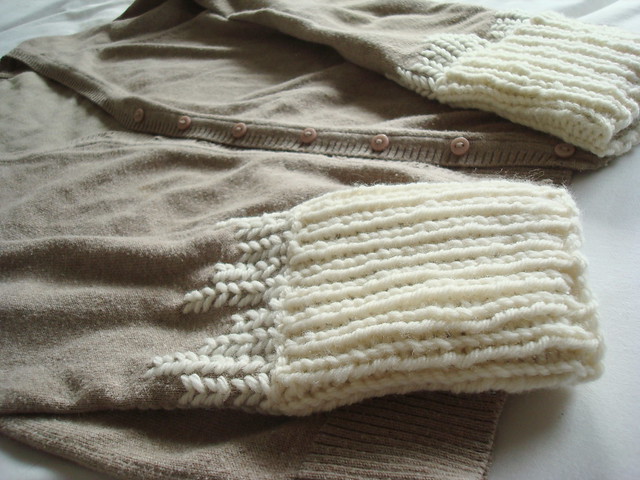
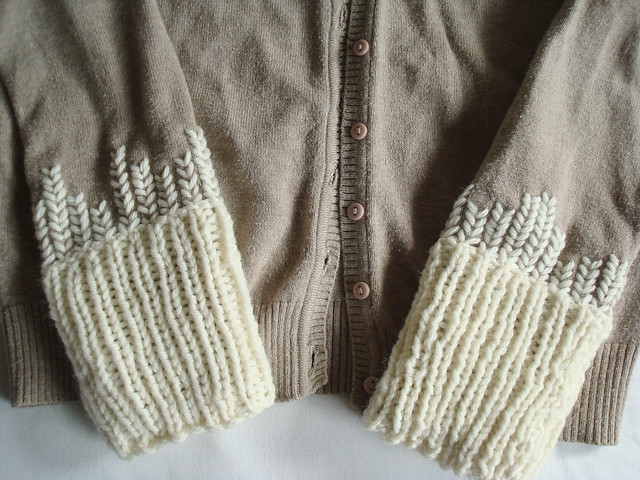
1. The yarn is labelled DK, but there is no way it's DK- Its definitely an Aran weight. I think the contrast works really well with the fine gauge of the original cardigan.
2. I'm sorry, but I didn't do a video of how I sewed on the knitted trim.... :( It's not expertly done, I relaly just tacked it down and moved on to the embroidery. I'm not a perfectionist, so I just winged it. 
3. You can check out the project page on Ravelry here!

My creation

Wednesday, 11 April 2012

Upcycled Cardi Challenge, Part III: The Body


I thought it would be helpful to show a quick video on how I do the embroidery for the cardigan:


Upcycled Cardigan from Julie Knitted Bliss on Vimeo.

Gatsby crashes almost all of my videos- he's such a ham for the camera.

I'm soooo close to being finished! As of last night, I only have a little bit of embroidery left to do around the front edge.

In answer to the questions left on the last Upcycled Cardi post:

1. The knitted ribbing is attached by just sewing it on along the fabric, at both the top and bottom. I didn't trim anything off the cuffs/sleeves before attaching the knitted ribbing.

2. The embroidery is pretty simple, I'm just winging it- I use a tapestry needle to mimic the exact same direction stockinette stitches are formed.

3. I'm using  6mm (US 10) needles for the k1,p1, ribbing, and a tapestry needle for the embroidery (the same one I'd use for weaving in ends). The same yarn is used for both the knitting and embroidery- it claims to be a DK on the label, but I don't believe it for a second- it's definitely worsted. 

4. How the knitting is attached: After measuring [so, my gauge of k1,p1 knitting is 5 stitches per inch x cardigan circumference (29 inches) = 145 stitches to cast on for around the body. Sleeves use the same formula], I cast on and knit the ribbing independently of the cardigan. When length is complete, I cast off, and sew the ribbing to the fabric of the cardigan.

5. My skin: Thanks! I don't do anything fancy to it- I wear sunscreen (spf 30 or higher) every day regardless of the season/cloud cover, use rose hip seed oil at night (any health food store will carry it), and drink about a litre of green tea a day (seriously). Although these days, it's naturally decaffeinated green tea (I'm drink some right now, actually).  That's it. I don't do toner/masks/serums/facials/etc. I don't have a particular moisturizer that I use (except the rose hip seed oil at night). If I know that I'll be doing FO photos, then I'll use a skin illuminizer on my face under foundation- it's like liquid photoshop, that stuff.

Friday, 9 March 2012

Upcycled Cardi Challenge, Part II: Sleeves

I took the advice that was in the comments on the last post, and started with the sleeves. I love how they have turned out, it really makes me excited to tackle the main body!

Anthro sleeves 2


The embroidery takes a while, but I love the result. I'm so excited to finish this cardigan, and I'm especially pleased that I'll be able to wear it both while I'm demonstrably pregnant and afterwards, when I (hopefully) get my figure back.

Anthro sleeves 3


In answer to some of the questions that arose from the last post:

1. I think I'm going to stick with straight fronts, since I don't feel that the original cardigan is long enough to have flattering angled fronts  (even though I'm planning on attaching the knitted trim lower down, so the cardigan will be at least a few inches longer than it currently is).

2. I'm not going to keep the buttons on the front, I'm not concerned about being able to do it up at all- I think the embroidery with cover up the button holes on the other side, as well.

3. How I cast on- long tail cast on. It's my preferred cast on. But I'm a lefty, so I basically cast on backwards.

4.Yup, I have a cat named Yarn. She is a total lap cat, and needs lots of snuggles. I have two cats, the other is Gatsby, who is very chatty and never fails to greet me at the door whenever I come home. Sometimes he just looks at me and purrs. They are spectacular felines. I also have an adorable hedgehog.

anthro sleeves

So, the next challenges: I'm not sure if I've done the embroidery long enough on the sleeves, but I decided to leave it as-is until I finish the body trim and embroidery, and see how far up I want it. I'm also considering adding some additional embroidery along the front edges (to cover up where I'll be cutting off the buttons, and the old button holes). What do you think? is there such a thing as embroidery overkill?

Thursday, 23 February 2012

Upcycled Cardi Challenge, Part I

Dreadful indoor/evening photos, but you'll get the idea.  And oh look, a kitty polaroid!

That's one of my kitties, Yarn. You know how cats love photo shoots. 


This is the cardigan I'm planning on using for the the revamp, and this is the yarn- some knitpicks merino style that I've had kicking around in my stash for at least 4 years. I think it's a good match for this. 

I've swatched the ribbing portion in my chosen yarn and needles (6 mm, US size 10), and am getting  5 stitches per inch in the ribbing. The cardigan is 26 inches around, when laying flat.


Now, the first decision to make: do I want the angled fronts, like the original cardigan? Or would I prefer normal, straight fronts?


I think I'm leaning more towards straight fronts. The angles of this are nice enough, but that's not what attracted me to the cardigan. Also, I don't feel super confident about copping the fronts evenly.  What do you guys think? Straight fronts? Or should I go for the chop? I have to decide before I cast on, as the angled fronts would change how much ribbing I'll need from left front to right front.

Saturday, 18 February 2012

Upcycled Cardi Challenge and Stockholm Scarf Giveaway Winner

The Stockholm Scarf Celebration Giveaway winner is.... Bee, who posted this thoughtful comment:

"Congratulations on your lovely pattern's well-deserved popularity! I've had Stockholm queued up on The Rav ever since the weather turned a touch icy here in Somerset.
Were I to get the chance to knit Stockholm in a Tanis colourway, I think I'd have to plump for Mallard. All that blue-green sheen would zing up my winter clothing for sure!"

congratulations,Bee !! 


I was totally blown away by the sheer volume of comments. It takes a lot of time to go through all the comments, but it's so exciting to make one knitter feel really special and get the yarn they want for their Stockholm Scarf!

I've been thinking about doing a little upcycling with the old wardrobe lately ( mainly because I'm trapped in maternity clothes and they are getting kind of old). Consider this:  


This is a lovely (and expensive!)sweater from Anthropologie, a store filled with clothes I would love to own but most days cannot afford.  I pinned it ages ago as something that I thought would be an amazing project for up-cycling a cardigan- adding knitted ribbing, and embroidering on the stitches.

It occurred to me the other day that I have a cardigan this colour that I hardly ever wear (although more simple, without the reversed seams of this one), because I find it sort of blah. and I certainly have some cream coloured yarn in my stash. I already have everything I need! So- this is my public declaration of taking on recreating (more or less) this sweater at home. Let's see how well I do! I'll be sure to keep careful notes, in case this is a wonderful upcycling success and others wish to give it a go. of course, it could just as easily be a yarn bombed disaster that doesn't look stylish at all.... Stay tuned!